Design a Load Balancer
Design a load balancer supporting L4/L7 routing, health checks, and multiple algorithms. Covers sticky sessions, SSL termination, and horizontal scaling.
Quick answer: Design a Load Balancer
Design a Load Balancer is covered here as a practical system design interview problem. Design a load balancer supporting L4/L7 routing, health checks, and multiple algorithms. Covers sticky sessions, SSL termination, and horizontal scaling. Use it to practice requirements, APIs, storage choices, scaling bottlenecks, data consistency, observability, and failure handling for a easy interview round.
Focus on the problem being solved, the main design choice, the failure mode, and the tradeoff you would defend in front of a senior engineer. This page is part of the DosiBridge system design knowledge graph, so it links related concepts, interview problems, tradeoffs, and references instead of leaving the topic isolated.
Problem Statement
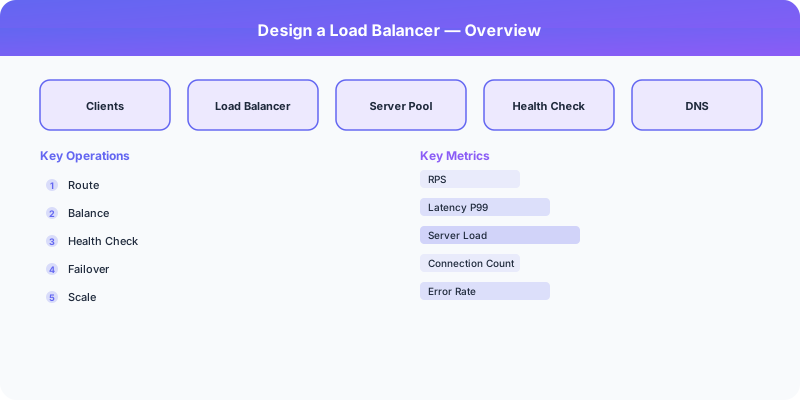
Design a load balancer that distributes incoming network traffic across multiple backend servers. It must support both Layer 4 (TCP/UDP) and Layer 7 (HTTP) balancing, perform health checks, and handle millions of concurrent connections while adding minimal latency.
Requirements
Functional
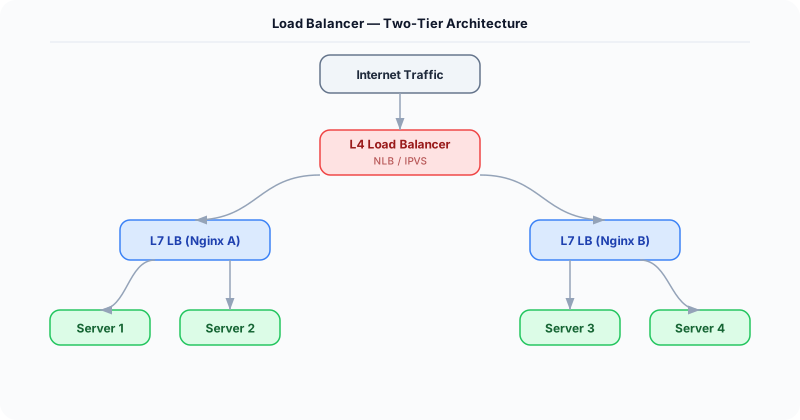
- Distribute traffic across a pool of backend servers using configurable algorithms
- Perform active and passive health checks; remove unhealthy servers from rotation
- Support sticky sessions (session affinity) for stateful applications
- Provide SSL/TLS termination to offload encryption from backends
Non-Functional
- Latency: <1ms added latency per request for L4, <5ms for L7
- Throughput: Handle 1M+ concurrent connections per node
- Availability: 99.999% -- the LB itself must not be a single point of failure
- Zero-downtime deployments of configuration changes
Core Architecture
-
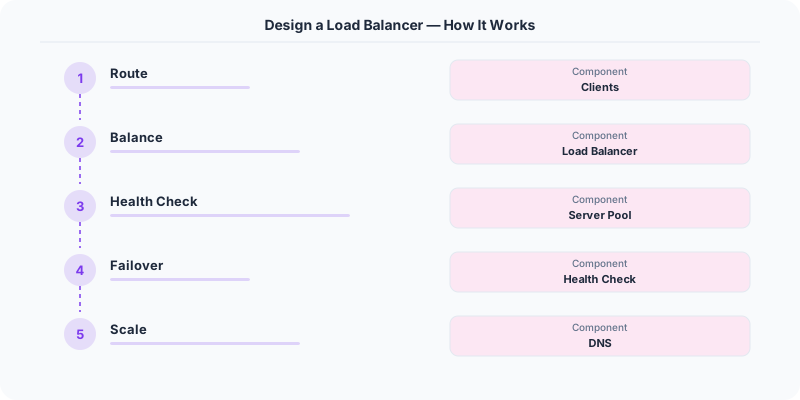
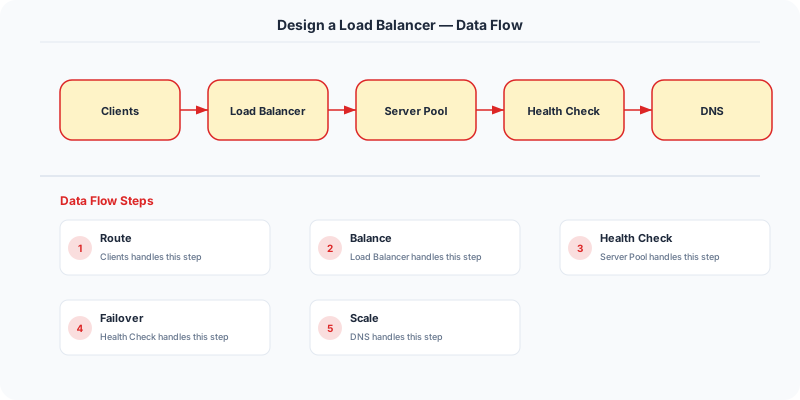
L4 Load Balancer (Transport Layer) -- Operates on TCP/UDP packets using IP and port. Uses Direct Server Return (DSR) where possible so response packets bypass the LB. Implemented via IPVS/eBPF in the kernel for line-rate performance.
-
L7 Load Balancer (Application Layer) -- Parses HTTP headers, URL paths, and cookies for content-based routing. Can route /api/* to API servers and /static/* to CDN origins. Performs SSL termination, request rewriting, and header injection.
-
Health Check Manager -- Active checks: sends HTTP GET /health every 5 seconds to each backend. Passive checks: monitors error rates (5xx) per backend. Servers failing 3 consecutive checks are removed; they are re-added after 2 consecutive passes.
- Configuration Plane -- Central config store (etcd) holding server pools, routing rules, and algorithm selection. Changes propagate to all LB nodes within seconds. Supports canary testing of new routing rules.
Database Choice
Load balancers are stateless by design -- no traditional database needed. etcd stores configuration (server pools, weights, health thresholds). Session affinity tables are kept in-memory using a bounded hash map with TTL eviction. For analytics and access logs, events are streamed to Kafka and stored in ClickHouse for dashboarding.
Key API Endpoints
PUT /api/v1/pools/\{pool_id\}/servers
  -> Body: \{ address: "10.0.1.5:8080", weight: 3, max_connections: 1000 \}

GET /api/v1/pools/\{pool_id\}/health
  -> Returns: \{ servers: [\{ address: "...", healthy: true, latency_ms: 4 \}] \}

PUT /api/v1/pools/\{pool_id\}/algorithm
  -> Body: \{ algorithm: "weighted_round_robin" | "least_connections" | "consistent_hash" \}
Scaling Insight
Use Anycast IP with BGP to advertise the same virtual IP from multiple LB nodes in different data centers. DNS resolves to a single IP, but BGP routing directs each client to the nearest LB node. If a node fails, BGP withdraws the route and traffic shifts to the next closest node within seconds. This eliminates the need for a "load balancer for load balancers" and provides geographic distribution naturally.
Key Tradeoffs
| Decision | Option A | Option B | Chosen |
|---|---|---|---|
| Layer | L4 only (fast, simple) | L7 (flexible routing) | Both -- L4 as first tier, L7 behind it for content routing |
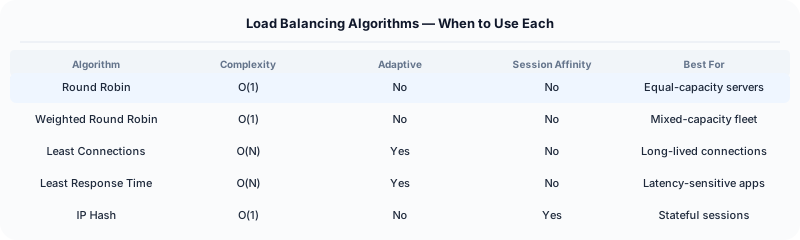
| Algorithm | Round robin (simple) | Least connections (adaptive) | Least connections default -- adapts to slow backends automatically |
| Session affinity | Cookie-based (L7) | IP hash (L4) | Cookie-based -- works behind NATs, more reliable for user stickiness |
Original DosiBridge notes for Design a Load Balancer
This section is written specifically for this page, not copied from a general system-design checklist. The useful way to study Design a Load Balancer is to connect the concept to a traffic-management problem where overload behavior matters more than the happy-path diagram. That framing changes the design discussion from definitions to operating choices.
What makes this topic distinct
- Core Entity: For Design a Load Balancer, decide the core entity before choosing tools; otherwise the design looks clean but fails when design changes.
- Read/Write Path: For Design a Load Balancer, decide the read/write path before choosing tools; otherwise the design looks clean but fails when load changes.
- Contention Point: For Design a Load Balancer, decide the contention point before choosing tools; otherwise the design looks clean but fails when balancer changes.
- Abuse Path: For Design a Load Balancer, decide the abuse path before choosing tools; otherwise the design looks clean but fails when design changes.
- Recovery Workflow: For Design a Load Balancer, decide the recovery workflow before choosing tools; otherwise the design looks clean but fails when load changes.
Design a Load Balancer correctness boundary
For this problem, separate the user-visible action from background work. The correctness boundary is the smallest state transition that must not be duplicated, lost, or reordered. Naming that boundary makes the solution more original than a stock API/database/cache template.
Design a Load Balancer scaling bottleneck
The first bottleneck should be described in the language of this system: a hot timeline, a contested seat, a busy wallet ledger, a media-processing queue, or a search index update delay. That bottleneck decides which component deserves the deepest interview discussion.
Production review question
If Design a Load Balancer suddenly receives 10x traffic, which entity becomes contested first, and what queue, lock, shard, or cache protects that entity without hiding correctness bugs?
Practical metric to track
Track design-balancer health as a named dashboard or review item: combine one user-facing metric, one saturation metric, and one correctness metric. For Design a Load Balancer, this keeps the discussion grounded in behavior that can be measured after deployment instead of generic advice that sounds good in an interview but never gets verified.